How to Backup and Restore Your Raspberry Pi Image
I have been using my raspberry pi for almost a month. During this time, I have configured a lot on it: installing required softwares and tools for work, configuring the network and hotspot, etc.
Considering the amount of time and effort spent, it is very important for me to backup the raspberry. In fact, the first day I received my raspberry pi, after having setup so many things, I accidentally disconnect the power cable causing my raspberry didn't boot at all.
All my effort were vanished 😱

After that incident, I quickly researched how to take a snapshot, clone it on another microsd card and successfully booted from it.
So here we go, the step by step using Debian/Ubuntu:
Image Backup
Put the microsd on computer. It will be mounted by default in the /media/<user>/.
> ls /media/agung/
boot  rootfs
Please keep note of boot and rootfs, as this is the raspberry partitions name.
Now invoke this to see where the partition disk is located
> df -h
Filesystem      Size  Used Avail Use% Mounted on
....
/dev/sdc1       253M   54M  199M  22% /media/agung/boot
/dev/sdc2        29G   11G   18G  38% /media/agung/rootfs
....
As you can see, in my case it is located at /dev/sdc1 and /dev/sdc2, so the disk is /dev/sdc. Please keep note that yours may be different. The number after sdc is basically saying about partition number.
Now comes to the snapshot step. Please prepare available disk size more than the size of your microsd card. So if you are using 16GB microsd, eventhough the content of the raspberry pi is less than that, ensure that you have 16 GB of free room to keep the backup on the computer.
sudo dd bs=4M if=/dev/sdc of=/home/agung/Backups/raspberry-pi-2020-02-05.img
Above command use dd to do low-level copy from the /dev/sdc to the backup location indicated by of argument value. Please note you should use absolute path for of. Also in Mac OS, you should use bs=4m.
Please wait for a while as it can take some times. You can track the progress by this command:
watch du -sh /home/agung/Backups/raspberry-pi-2020-02-05.img
Resize Snapshot Image
As you noticed, the snapshot size is equal to the size of microsd capacity. We can make the snapshot smaller.
First, we need to mount the snapshot image. To do so, first we need to find the unused loop device:
> sudo losetup -f
/dev/loop20
Then we tell it to link the loop device from the snapshot image
sudo losetup -P /dev/loop20 /home/agung/Backups/raspberry-pi-2020-02-05.img
Now at this stage, the /dev/loop20 already linked to the snapshot image. The -P flag is there so kernel is force scan the partition table on the disk.
Next, we can now use gparted to modify the partition.
If you don't have gparted installed, just install it by sudo apt install gparted.
sudo gparted /dev/loop20
It will show list of partitions inside the disk:
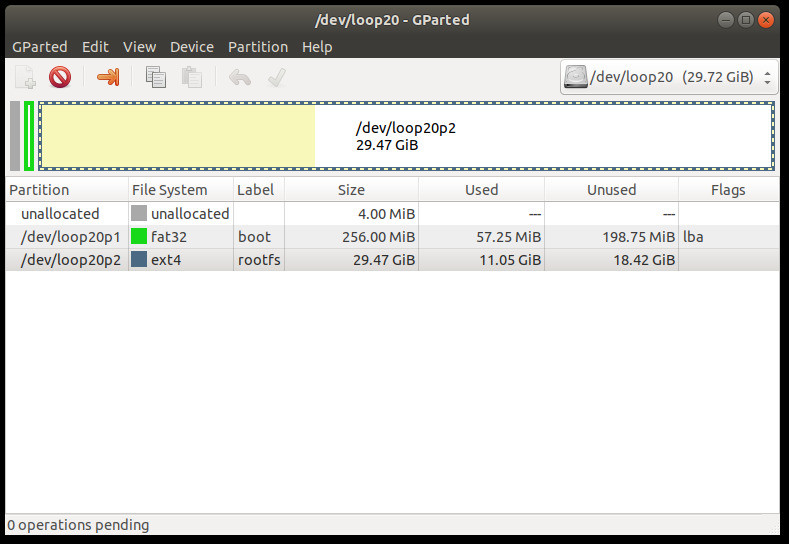
The /dev/loop20p1 is the first partition and the /dev/loop20p2 is the second. So they are boot and rootfs partition that we saw in the backup section.
Now we need to reduce the partition size of /dev/loop20p2 (rootfs partition).
- Right click on
/dev/loop20p2and choose Resize/Move - Move the black right arrow from right to left to resize the partition. The white part is the unused part (contains no data) while the yellow has data.
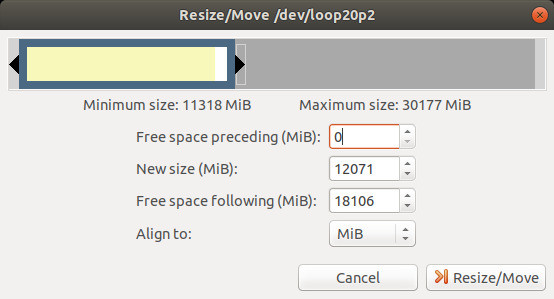
Just to be safe, I added more free storage (white part) around 1-2 GB.
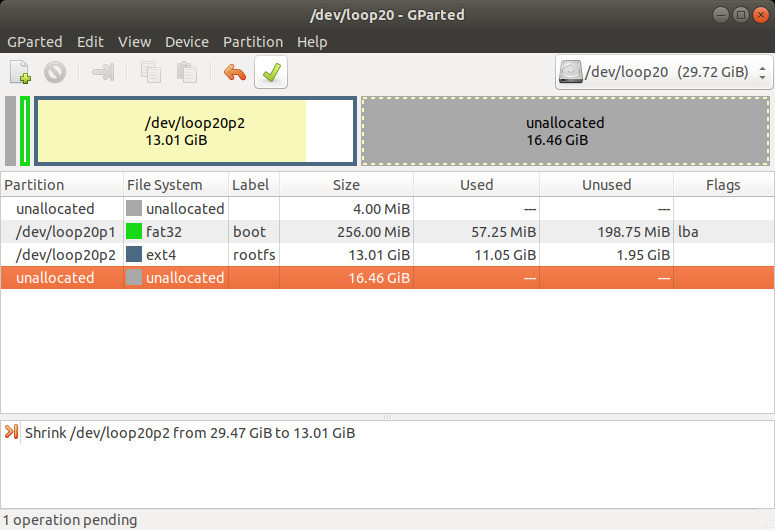
- Click Apply (the green checkmark) to apply the resize operation.Now to check if the filesystem is okay:
So we resized the partition, however the snapshot image size is still not reduced. There are a few things to do, to free up the unused space:
- Calculate the partition size using
fdiskand inputpas the command: - The sector size is
512bytes and the end sector is27807743. Since sector number is started at 0, then we need to truncate the snapshot with this:
Done, by now the snapshot image size should be reduced.
Restore/Clone Image from Snapshot
Now with the snapshot image that we have, we can restore this snapshot to the microsd card with this step:
sudo dd if=/home/agung/Backups/raspberry-pi-2020-02-05.img of=/dev/sdc
Yes, we just reverse the input (if) and output (of) location.
That's it 😃
Bonus: Reclaim More Storage on The Restored MicroSD Card
Since we restore the microsd card from the size-reduced snapshot image, then consequently the disk partition size is also not utilizing the full capacity of the sd card too.
You can reclaim the storage by:
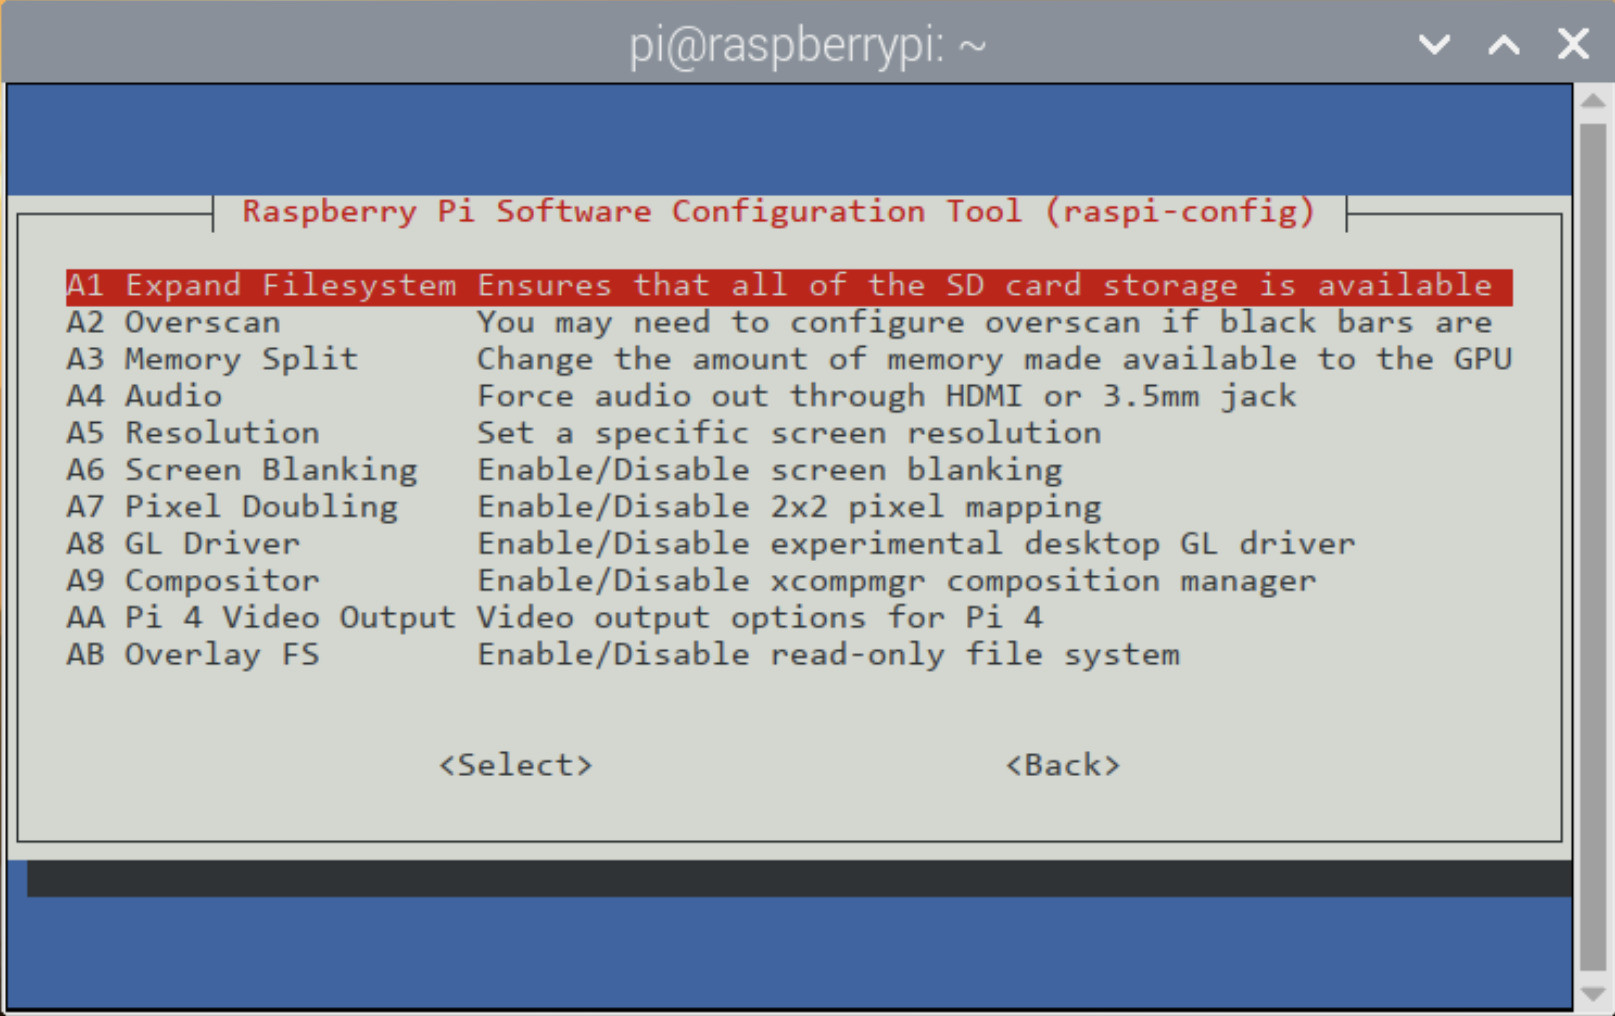
sudo raspi-config
Then choose Advanced Options -> Expand Filesystem
Member discussion